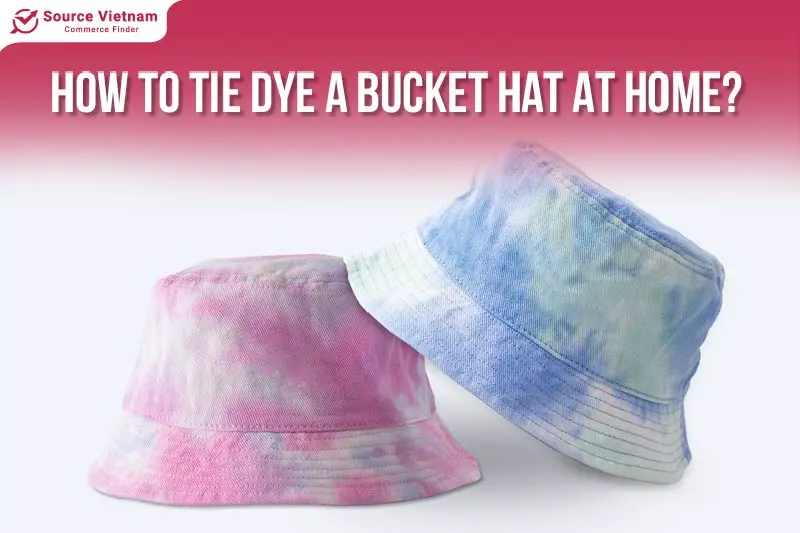
You can explore two main methods of tie dye bucket hats: normal dyeing and ice tie dye. Each approach yields a unique visual effect and requires a slightly different process. Delve deeper into how to tie-dye a bucket hat creation through today’s informative article.
Overview of the Bucket Hat Market
Fueled by the personalization trend in fashion, the dyed hat market has been experiencing rapid growth in recent years, according to a report by Allied Market Research. This report projects that the global dyed hat market could reach a peak of USD 2.46 billion by 2028, reflecting a compound annual growth rate (CAGR) of 8.3% from 2021 to 2028.
Dyed bucket hats are a thriving niche within the broader bucket hat market and are experiencing significant growth. Analysis suggests several factors driving this trend, including the ever-present desire for personalization in fashion.
People increasingly seek to express their unique style through clothing and accessories, creating a strong demand for wholesale custom bucket hats. Additionally, the rise of social media has fueled the DIY (Do-It-Yourself) movement, with many findings of enjoyment in creative endeavors. This has led to a growing market for blank canvas options like wholesale custom bucket hats, allowing businesses and individuals to design and create unique headwear.
Prepare before dying a bucket hat
Wearing a bucket hat will make your outfit look cooler and more fashionable, giving you more confidence when going out. And if you’re bored with the hats on the market, you can totally create your own hat. Before dyeing the hat, check out the materials you need to prepare.
Choosing the right hat for tie dye
The foundation for a vibrant tie-dye project starts with the hat! Opt for a plain white hat made entirely of 100% cotton to achieve optimal shape retention and color results. Here’s why cotton reigns supreme:
- Superior dye absorption: Unlike polyester and other synthetic materials, cotton readily absorbs dye, ensuring vibrant and even coloration. Synthetics often repel dye, leading to patchy or muted results.
- Shape retention: Cotton fabric maintains its structure throughout the dyeing process, guaranteeing the hat keeps its original form.
- Color vibrancy: White serves as a blank canvas for your dye creations. The absence of pre-existing colors allows the tie-dye pigments to truly shine, showcasing the full spectrum of your artistic expression.
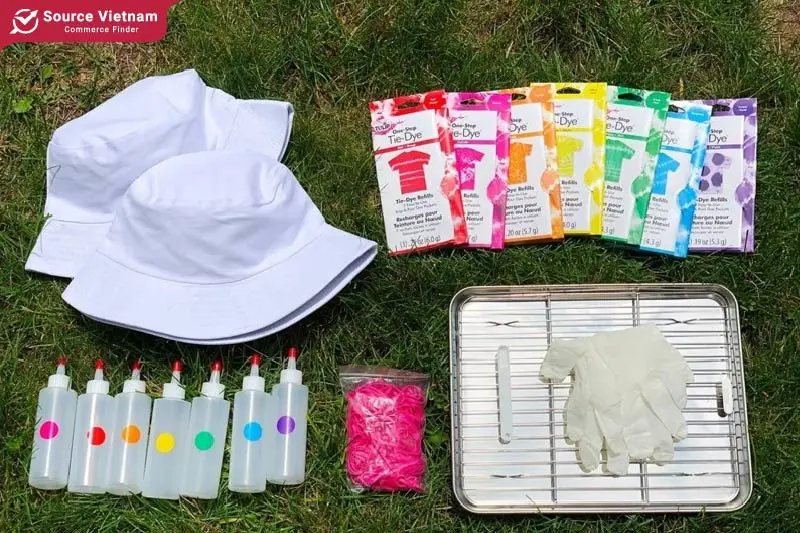
Other tie dye essentials
- Color powder: These pigments, typically made from safe, organic, or inorganic substances, come in many colors. Choose your favorites and unleash your creativity.
- Squeeze bottle: These handy tools help dilute your chosen color powders and precisely apply them to the fabric for intricate tie-dye patterns.
- Gloves: Protect your hands while handling dyes with these disposable gloves.
- Rubber bands are essential for securing and creating different tie-dye patterns on your hat.
- Soda ash: While not mandatory, soda ash can enhance dye uptake and intensify the final color vibrancy. Consider adding it to your tie-dye arsenal for even bolder results.
- Large container: A bucket or other large container is a convenient vessel for soaking your hat during dyeing.
- Plastic wrap: Use to cover the hat in the last step, allowing the colors to set beautifully.
Related News


How to tie dye bucket hats at home?
Before dying a bucket hat, you should wash the hat thoroughly. Stains can interfere with dye absorption and affect the final color outcome. A clean canvas ensures even and vibrant results. How to make a tie dye bucket hat at home? See the following guide to understanding:
How to tie dye a bucket hat in the classic method?
This is the most common and accessible method for tie-dyeing your bucket hat. Here’s a step-by-step guide:
Step 1: Wet the hat
Start by ensuring your hat is damp but not dripping wet. You can achieve this by dipping it briefly in water or dyeing it right after washing when it still retains moisture. A damp canvas allows for even dye absorption and vibrant results.
Step 2: Roll the hat into your tie-dye patterns
The beauty of tie-dye lies in its endless customization possibilities! Choose a design that inspires you, whether a classic spiral, an eye-catching bullseye, or a unique freehand pattern. Here are some basic techniques to get you started:
- Spiral: Pinch the center of the hat crown and twist the fabric downwards in a spiral motion. Secure the spiral at various intervals with rubber bands.
- Bullseye: Pinch the center crown and secure a rubber band tightly around it. Create additional concentric circles with rubber bands at varying distances from the center.
- Freehand: For a more spontaneous approach, simply scrunch or bunch up the hat fabric in sections and secure it with rubber bands.
Step 3: Use elastic or drawstring to secure
Once you’ve achieved your desired pattern, use rubber bands or string to tightly secure the fabric sections. Avoid over-tightening, as this can restrict dye flow and create uneven coloration. The final rubber band should be placed close to the brim to ensure a uniform pattern.
Step 4: Prepare the soda ash mixture (optional)
Soaking your hat in a soda ash solution enhances dye uptake and intensifies the final color vibrancy. To prepare the solution, dissolve 1 cup of soda ash in 1 gallon of warm water. Soak the hat in this mixture for at least 20 minutes, occasionally squeezing and turning it for even absorption.
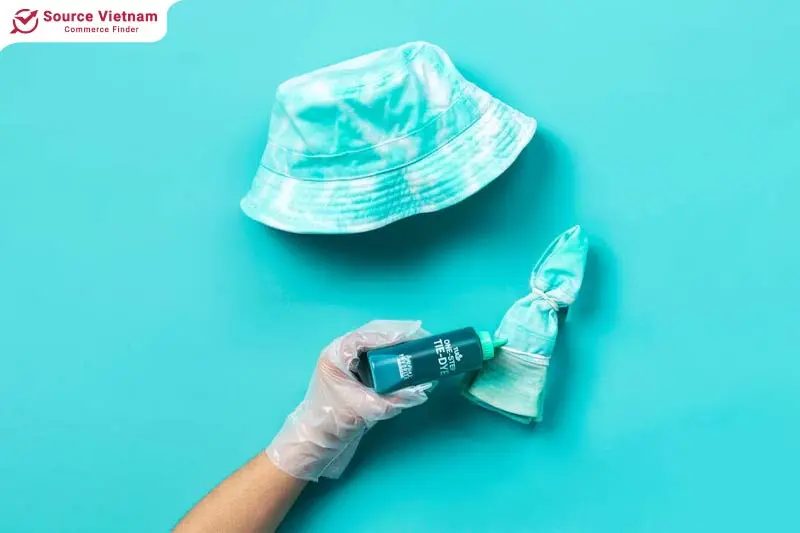
Step 5: Prepare the dye
In this step, don’t forget to grab your gloves. Protecting your hands from dye stains and potential allergic reactions to the chemicals is important. If you’re using a pre-made tie-dye kit, the packaging will likely have instructions on how to mix the colors. But if they don’t have the user guide in packaging, here’s what to do:
- Fill your squeeze bottle (or any recycled jar/bottle you have on hand) with warm water. Think of it as your blank canvas for vibrant colors!
- Start slowing with the dye powder: adding more dye than removing it later is always easier. Pour a small amount of the powder into the water.
- Shake it: once you’ve added the dye powder, secure the lid tightly and shake the bottle well. Keep shaking until the dye is completely dissolved and the water transforms into a beautiful colored solution.
You can experiment using hot water instead of warm water to create a more concentrated dye solution. However, be careful – very hot water can damage the cotton fibers of your hat.
You can consider mixing the dye solution in a larger container first. Once the dye is fully dissolved, transfer the desired amount to your squeeze bottle for easier application during the dyeing process.
Step 6: Proceed to dye the hat
After removing the hat from the soda ash solution (if used), take an empty bowl and place the damp hat inside. Now comes the exciting part – transforming your hat with vibrant colors. Next, pour your chosen dye colors directly onto the hat, one at a time. Be sure to reach all sides of the hat for even coverage. To encourage dye absorption, gently press the hat with your hand occasionally.
Continue applying different colors until the entire hat surface is saturated with color. Pay special attention to the hat’s brim – it might require more dye to ensure the color penetrates the folds and avoids leaving any large white spots.
Step 7: Complete the dyeing process
Once satisfied with the dye application, gently remove any excess dye from the hat’s surface with a clean tissue. Here’s where the magic happens! Cover the entire hat securely with plastic wrap to trap moisture and allow the colors to set vibrantly.
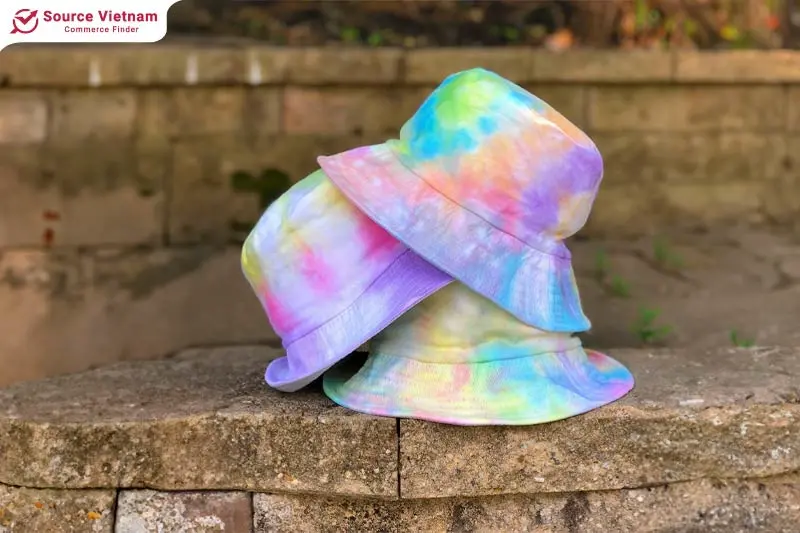
Aim to leave the wrapped hat undisturbed for at least 6 hours, but ideally, 24 hours will yield the most intense color results. Once the rinsing water runs clear, you can air-dry your hat or use a clothes dryer in a low-heat setting. And you have completed your tie-dye bucket hat masterpiece.
Ice tie dye method
Regarding materials, dyeing hats using the ice tie dye method also requires preparing basic items such as a plain hat, tie dye kits, gloves, and squeeze bottles. However, more specifically, you need to prepare ice cubes. The ice should be of moderate and even size, not too big. Another note when dyeing hats with ice tie dye is to prepare an additional mask/respirator to avoid health risks.
Step 1, 2, 3: Preparation steps
Like in the regular method, start by rolling and securing your hat with rubber bands (refer to the earlier steps for details). Next, prepare a soda ash mixture and soak your hat in it for 20 minutes.
Step 4: Prepare the container and ice
Now you can start dyeing. One difference compared to regular dyeing is that you do not leave the hats lying directly in the container but use an object to lift them. This will keep the color from sticking to the back of the hat once the ice has melted. One tip is to use plastic cups, place them face down in a container, and then place a hat on top.
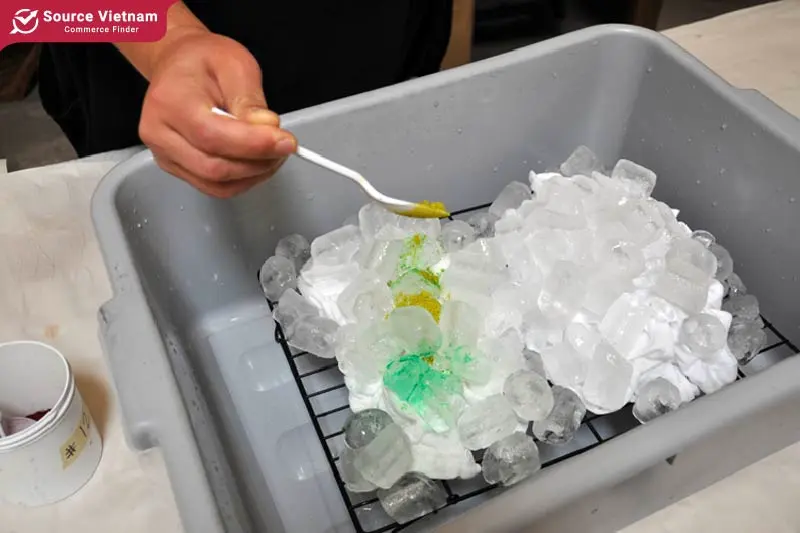
Next, you will spread the ice evenly over the surface of the hat. Because ice dyeing involves dyeing with pigment without mixing it, you must wear a mask to ensure safety. Also, be careful not to dye ice tie dye in a windy place to avoid others inhaling the pigment.
Step 5: Proceed to dye the hat
Begin by applying a lighter color dye. Use your spray bottle to mist the dye directly onto the ice cubes. Here’s a handy tip: consider using a spoon to sprinkle a small amount of dye powder onto the ice at a time for more controlled application.
Once you’ve applied the lighter color, continue adding your chosen colors in layers, following your creative vision. Keep sprinkling dye powder until the entire ice surface is covered, ensuring no blank spots remain. Remember, adding more dye powder will result in a darker final color, so you can customize the vibrancy to your liking.
Allow the ice to melt completely. The melting speed can vary depending on the ambient temperature, but expect it to take at least a few hours. After the ice fully melts, leave the hat undisturbed for another day. This extended resting period allows the dye to adhere more firmly to the hat fibers for a long-lasting result.
Step 6: Complete the dyeing process
After enough time, you can wash and dry the hat. During this washing step, you should wear gloves to avoid getting dye on your hands. Should be washed with water at normal temperature, avoid washing in hot water as the dye will fade faster. You can let it dry naturally or put the hat in the dryer.
Some notes when dyeing a bucket hat at home
Like crochet bucket hat, dying bucket hats at home is simple with basic tools. Nevertheless, to guarantee your safety and achieve the finest results with your colored hat, you also need to be aware of the following:

- Store dyes and chemicals carefully in a cool, dry place, especially out of reach of children and pets. This prevents accidental contact or ingestion.
- Protect your hands throughout the dyeing process by wearing gloves. This keeps your skin safe from dye stains and potential irritation.
- In case of accidental eye contact with your eyes, immediately flush them with clean water for several minutes. If any irritation persists, seek medical attention.
- Choose a well-ventilated area for dyeing. This helps disperse any mild odors that some dyes may emit and ensures you can breathe comfortably.
- When pouring dye onto your hat, aim for even distribution. You can gently squeeze the hat to encourage dye absorption and prevent blotches. This will result in a more uniform color without unwanted variations.
- Once you’ve dyed your hat, avoid drying it in direct sunlight. Harsh UV rays can cause the colors to fade faster. Opt for a shaded area or hang it indoors with good air circulation.
- For the first wash after dyeing, washing your hat separately from other clothes is best. This minimizes the risk of dye bleeding onto other items.
- Consider adding a small amount of white vinegar to your dye solution for an extra color pop. This can help the dye adhere to the fabric better, creating brighter and more vibrant colors.
- Always use dyes that are within their expiration date. Expired dyes might have a weaker coloring effect and potentially irritate your skin upon direct contact.
Conclusion
Through the instructions in today’s article, we hope you will successfully on how to tie dye a bucket hat at home. Looking to create your tie-dye bucket hat masterpiece? SourceVietnam.com will be your ideal platform. It offers wholesale bucket hats in bulk and other items for you to tie dye at home.
Our platform connects you directly with suppliers and factories for wholesale imports at competitive prices. It offers an easy and convenient import process, simplifying purchases for both wholesale and retail needs. Explore now!


